 An item was added to cart!


System Basics

Quick Links:
Prep Knowledge
Product Knowledge
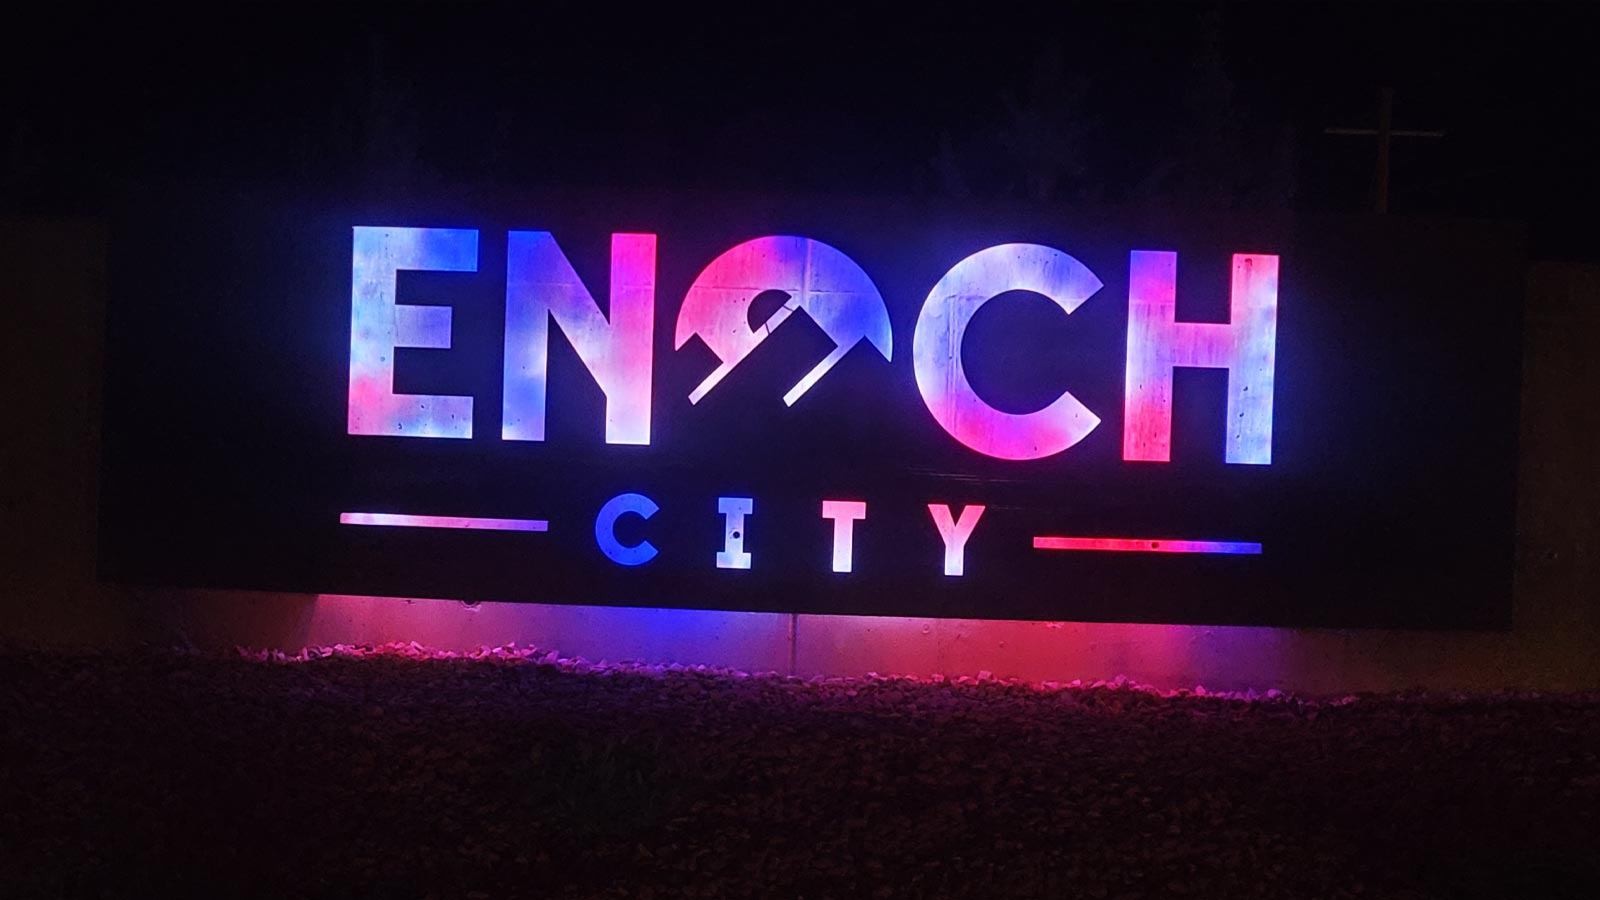
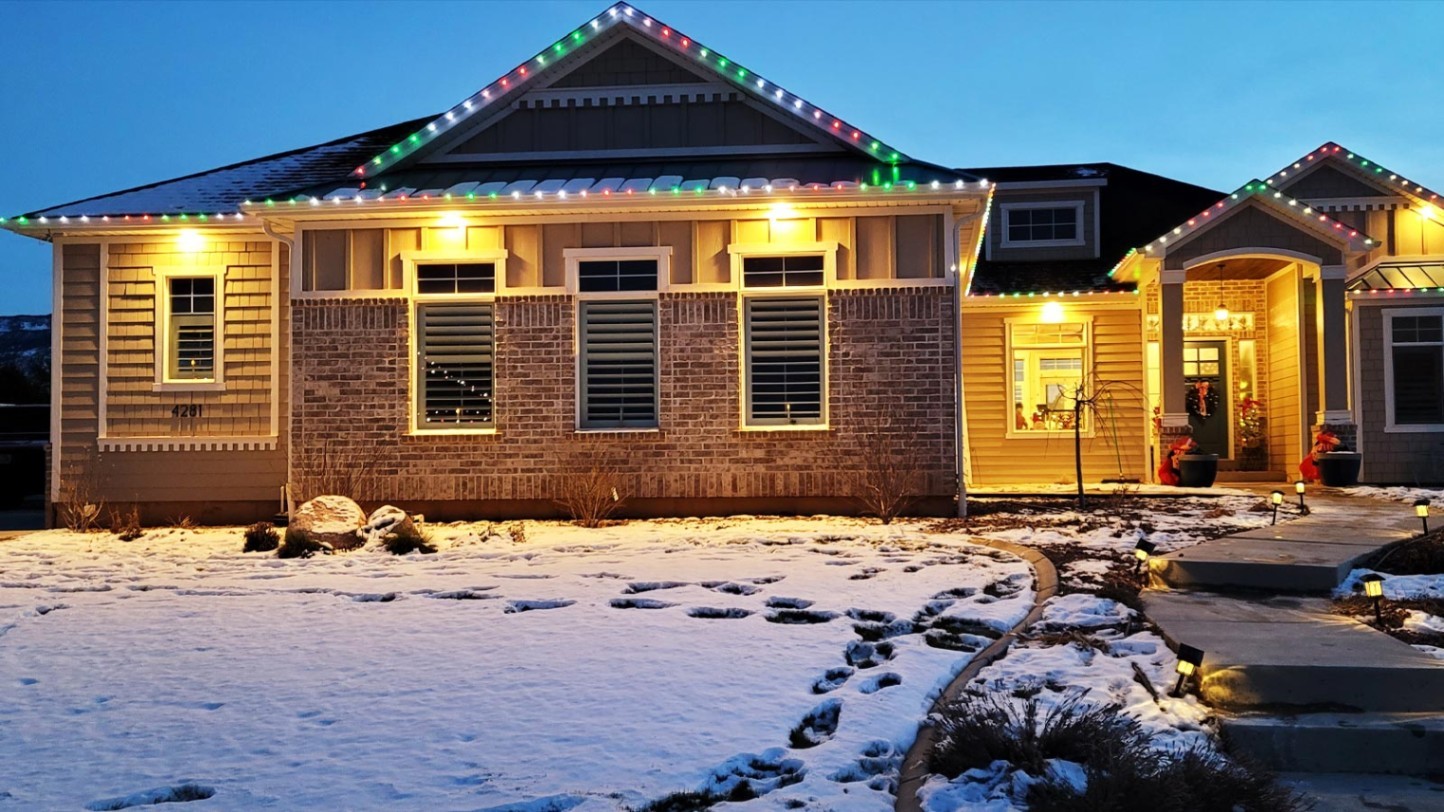
The Simplest Permanent Lighting System
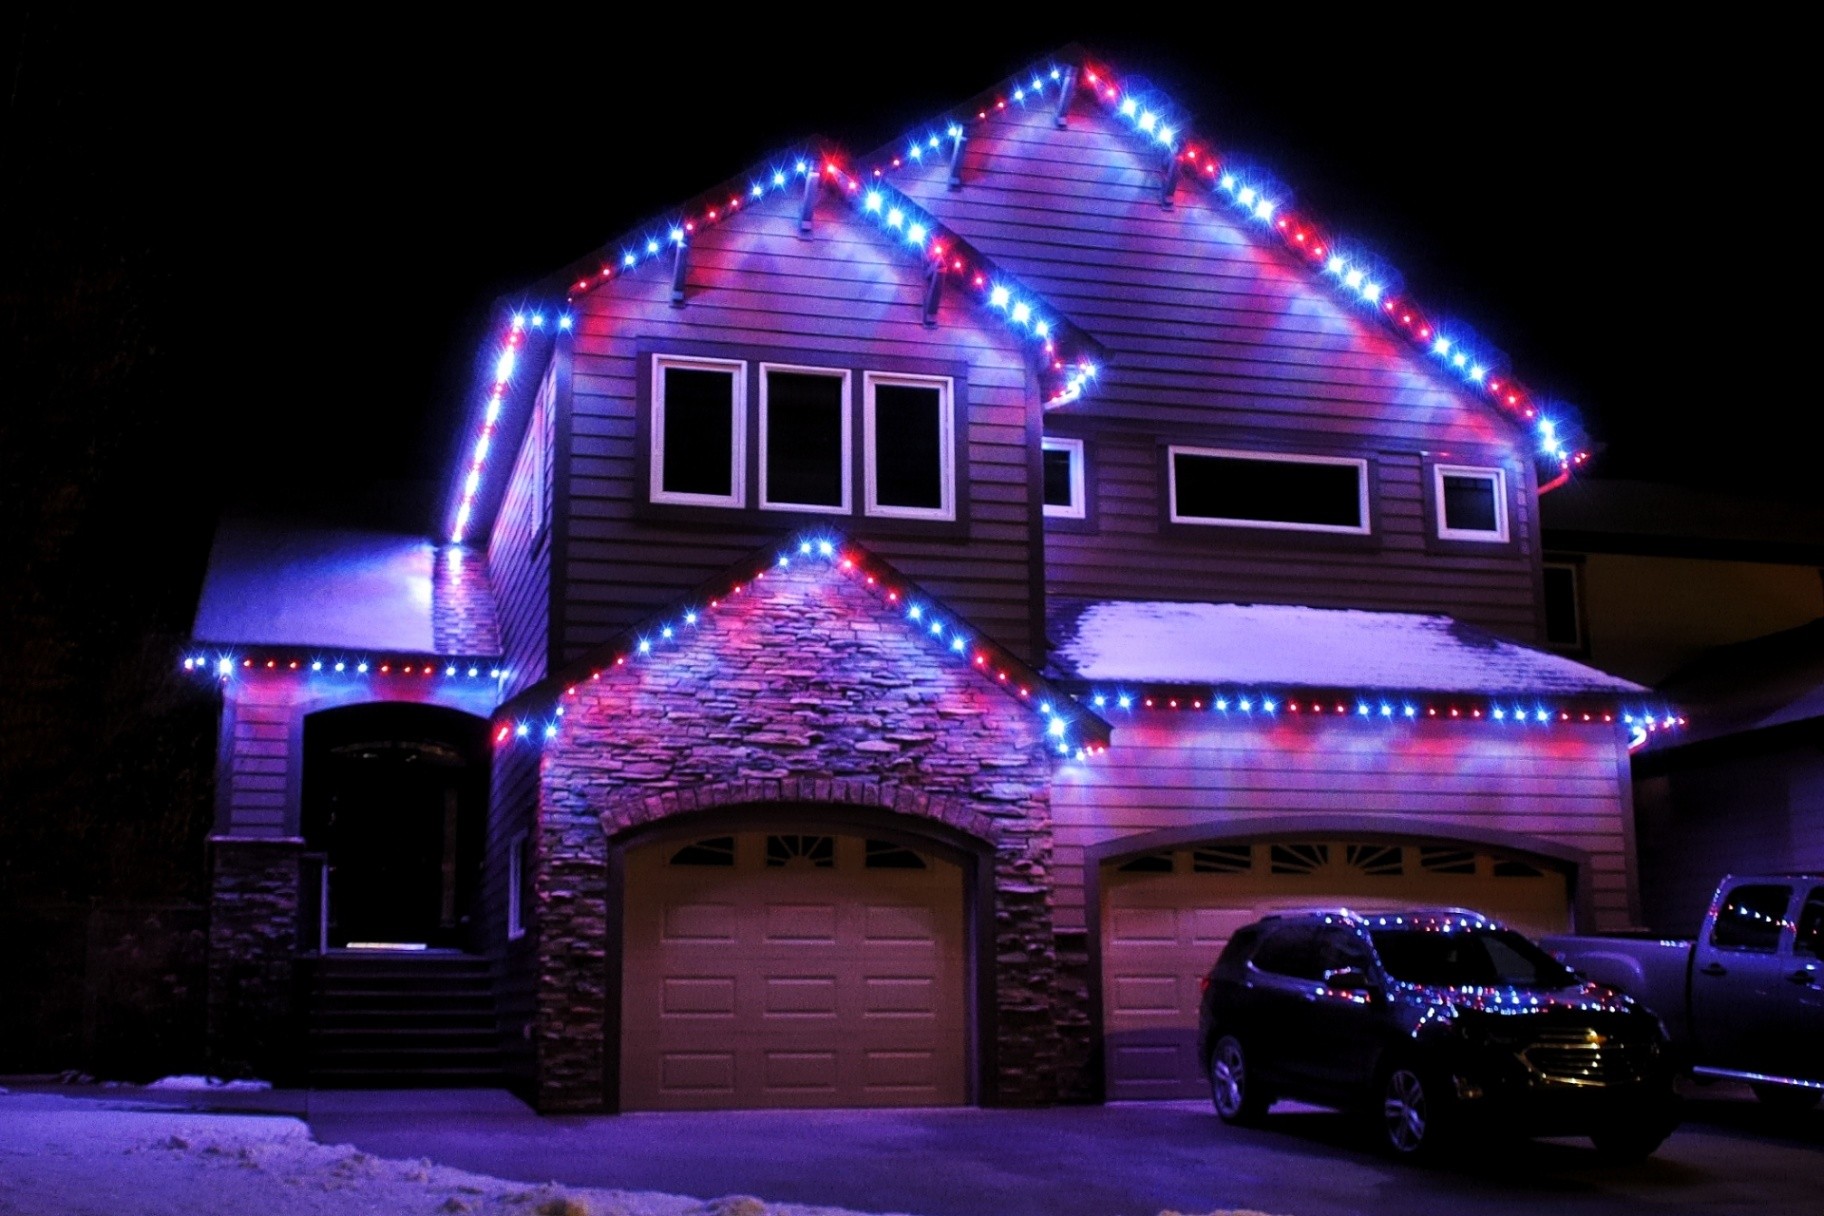
BEST PERMANENT HOLIDAY LED SOLUTION
+ Who can install PixelLights?
CLEARLY ANYONE
CAN DO IT!
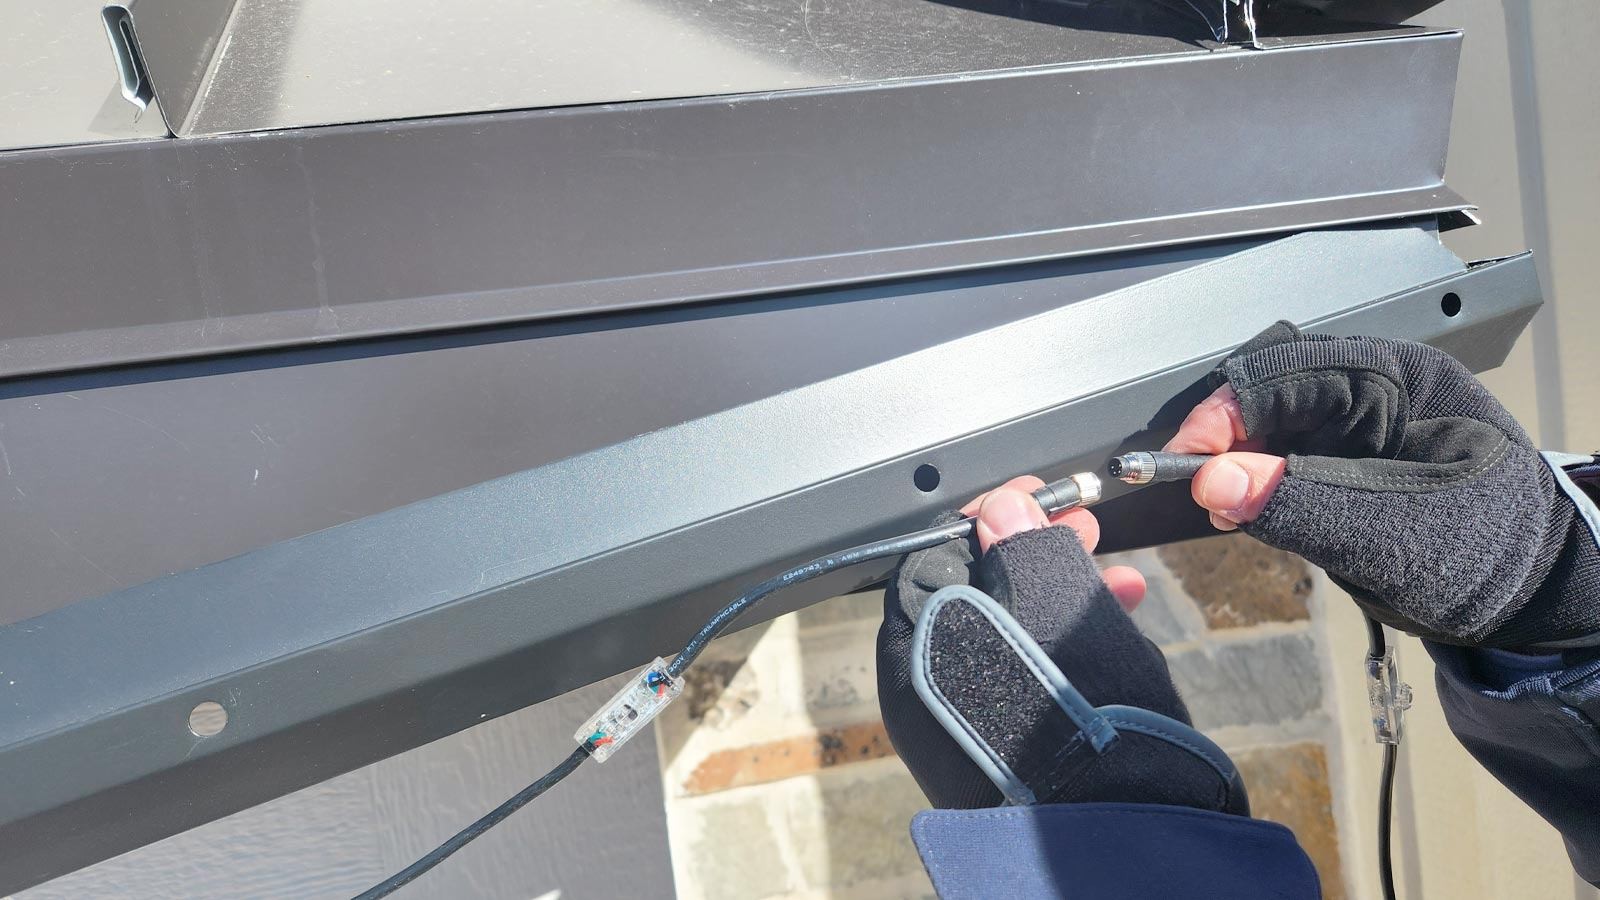
PixelLights are the easiest permanent LED lighting system on the market for anyone to put together. Connecting the LED light cables together has never been faster, safer, or easier. They can only be connected in one way: by screwing each end together, creating a high-quality waterproof seal. This helps reduce mistakes and connectivity headaches that come with other systems, saving you a significant amount of time and money.
It's Really That Simple!
TIME & MONEY SAVING ADVANTAGES:
- NO ELECTERIAL EXPERIENCE NEEDED
- NO SPLICING OR CRIMPING
- NO HEAT SHRINK
- NO EXTRA ELECTRIAL OUTLETS NEEDED
- NO POWER BOOSTERS
- NO PROBLEM
Measure Plan & Design
Great You would like to see what it takes to install permanent holiday lighting. Measure and Planning is just like me coming over to give you an estimate, which takes me about an hour after explaining how this all works.
Your measurements and putting that information on the worksheet will help you create a shopping list to figure your costs.
Try to be as exact and thorough as possible when taking measurements of the whole roofline where you want to install permanent lights. I always round my numbers up.
+ MEASURE
Project Measurements
It will always be best to physically walk around the property and take accurate measurements of the entire perimeter, including the gaps between the lights we call "jumps" of unlit extensions, before the next run of lights. Make notes as you go checking every where you what the light to run along roofline.
This guide will make it easy to understand
Advance Way to Measure
People who are good with technology and want a rough estimate should use Google Earth's Streetview images and 2D measuring tools. We are amazed at how accurate this is. An estimate is good as long as you order a little extra so your not short.
+ PLAN & DESIGN
Design the System
Not only does this worksheet help you with layout, it also helps create a shopping list. You should be able to draw your project on paper to calculate the quantities of items needed for the job. Making shopping easy!
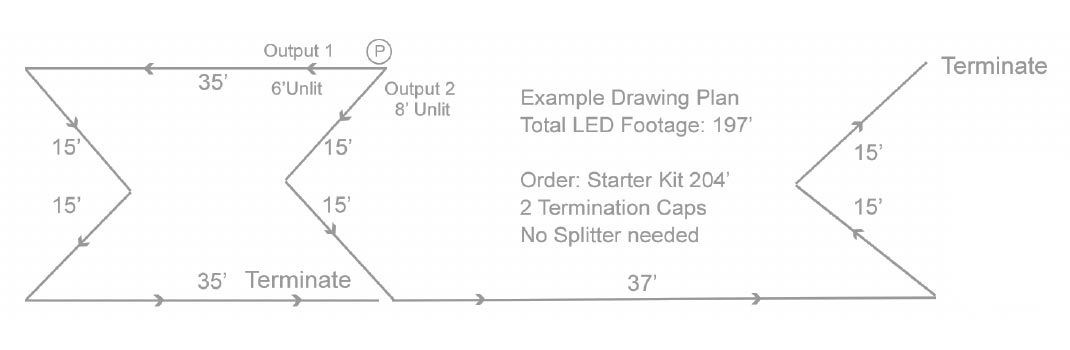
Learn Your Layout
We've Got a Guide for That!
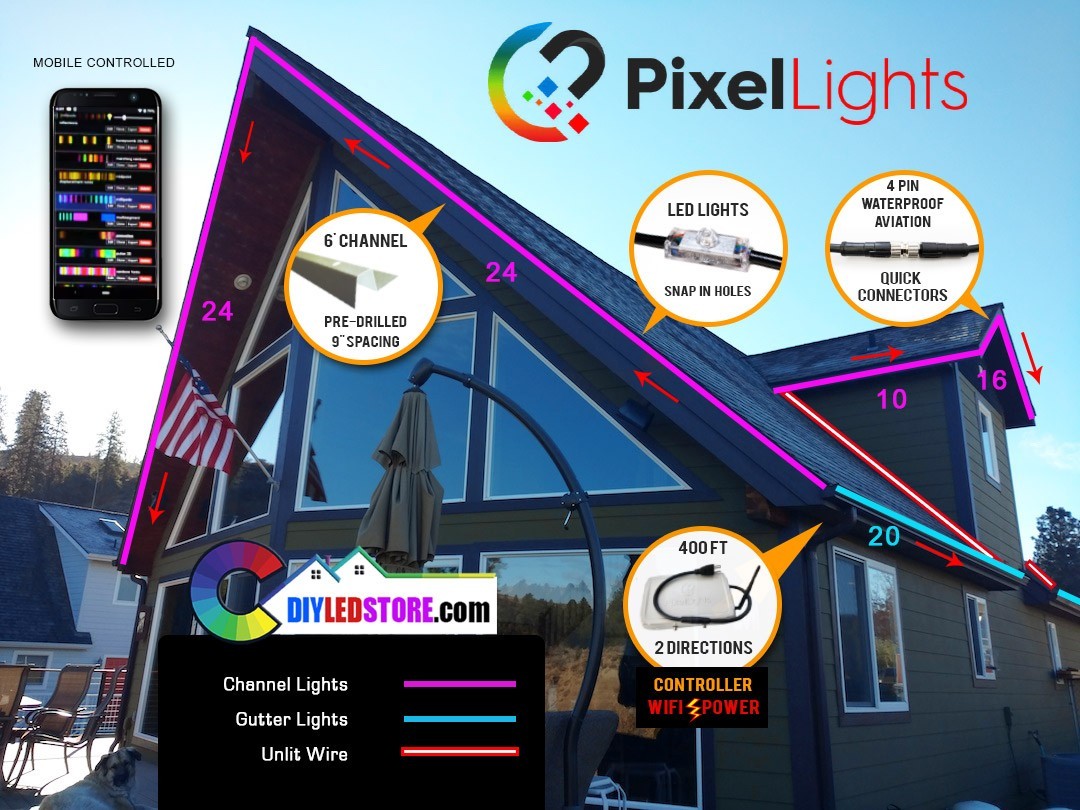
This Layout guide is your map where to start and finish. Knowing how to get the best use of the controller by where to place it. If planned right you can do sections at different times. Meaning if budget is tight do the front now and add on later if you wish. That is what I did. When doing layout you can note different area with different color markers or draw different kind of lines. straight, squiggle, dot dot dot, dash-dash-dash. this lets you know which area has channel or if it is lit cable or unlit cable.
You will understand when Download the Guide.
Measure & Planning Guides Step by Step
You can also access all of our guides by Clicking Here
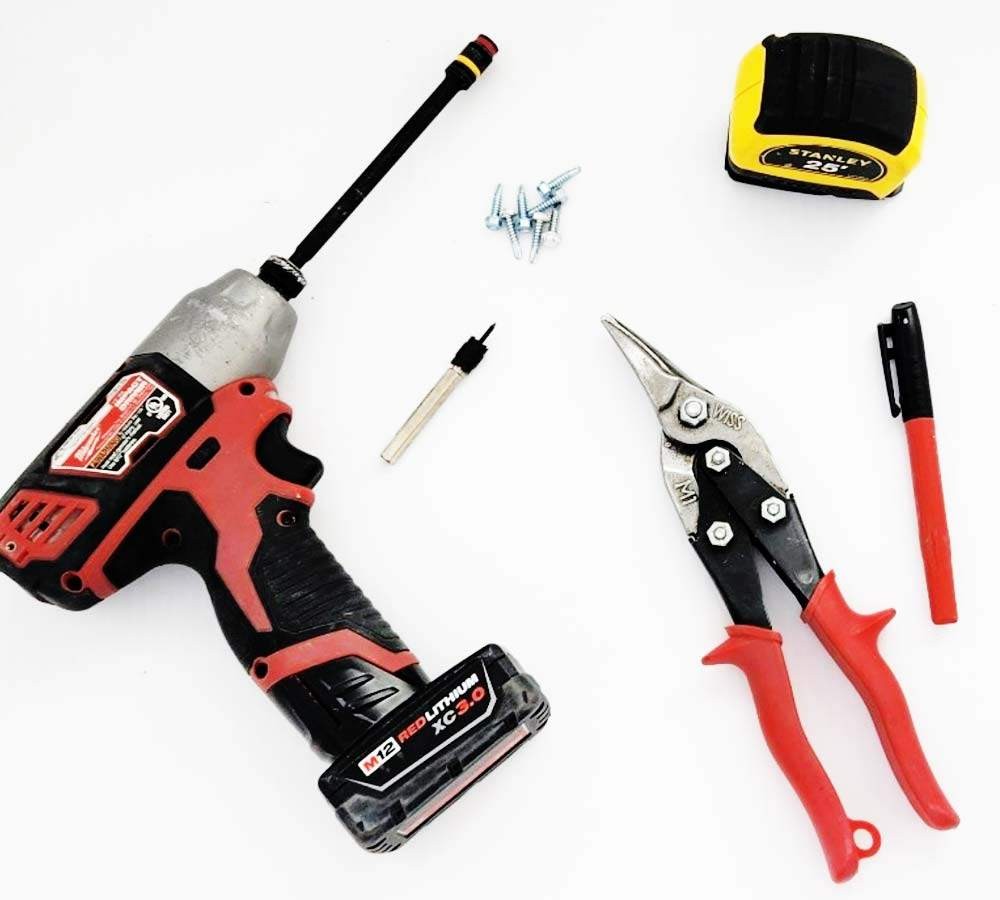
Tools Needed
The tools needed for installation of your Started Kit!
- Cordless Drill – To screw channels to your areas to be installed.
- Nut driver and self tapping screws
- Tape Measure - For planning and measure to cut channels
- Tin snips - to trim channel for angle cuts and finish the ends.
- Drill bit Included in Starter Kits used only if need to move bulb
- Ladder – Needed to reach the roof line for measure and Installing
- Screws & Colored Tape for hiding wires NOT included
LADDER SAFETY FIRST: This PixelLights system requires the use of ladders and that you be up on the roof elevated off the ground to install. It is extremely important that you read all instructions, warnings, and safety precaution labels that come standard on all ladders. Failure to do so, can result in critical injuries and possible death. Therefore if you are afraid of heights, unbalanced, or unsure of your personal abilities while using ladders, we highly recommend you hire someone instead of trying to install these yourself.
BEST ADVICE EVER!
PixelLights Starter Kit
Get the most value for your money with our exclusive starter kits, which include everything you need to get started.
Sizes Available:
78'ft | 102'ft | 126'ft | 150'ft | 180'ft | 204'ft
Simply choose the length and color of the Starter Kit that are closest to your project. Next, add any other components you need from your material list directly into our pop-out cart. This makes the ordering and checkout processes seem seamless.
Starter Kits Include:
- (1) PixelLights Controller 24V (2 outputs, 200 ft each, max 400 ft)
- PixelLights | 6' ft | RGB 8 Bulb Light Cables with Connectors
- Aluminum Channel | 6' ft | Pre-drilled & Pre-finished (many colors)
- (1) Each 10', 5', and 2' Unlit Cable (no lights)
- (1) Termination Cap (required at end of run)
- (1) PixelLights Drill bit
- (1) Bottle channel touch up paint
- (1) Extra Channel - (2) Extra for 180' & 204' kits
- (1) Splitter is included with the 204' Starter Kits Only
NOTE: To branch lights to second story dormers or peaks, don't forget to add unlit extensions and Splitter because these are not included with most kits.
+ Assembly Required
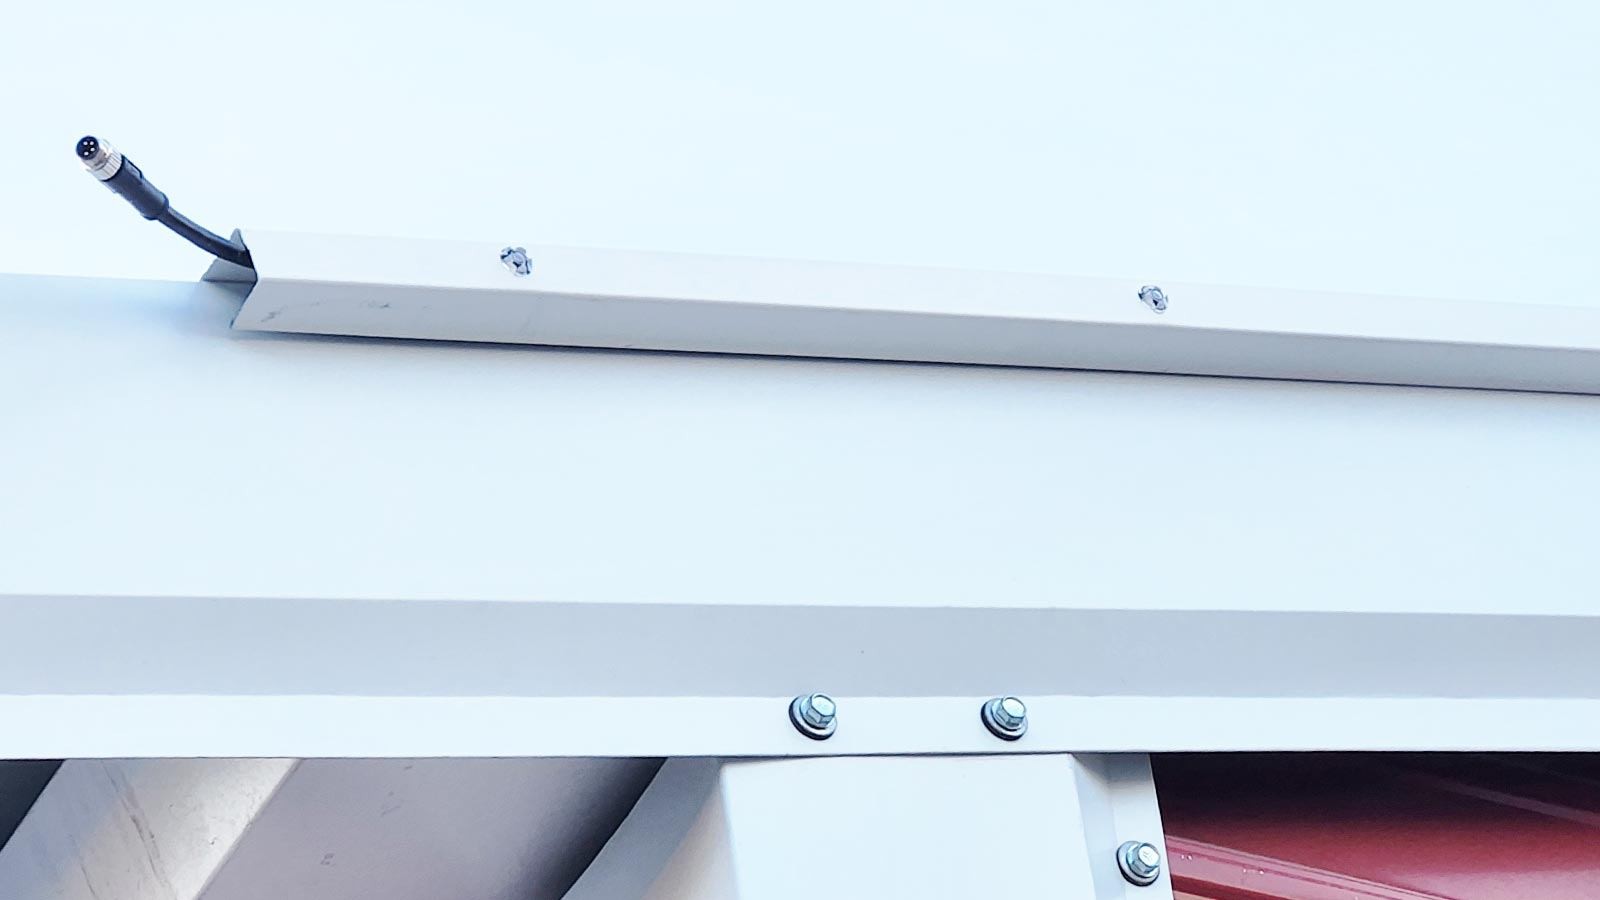
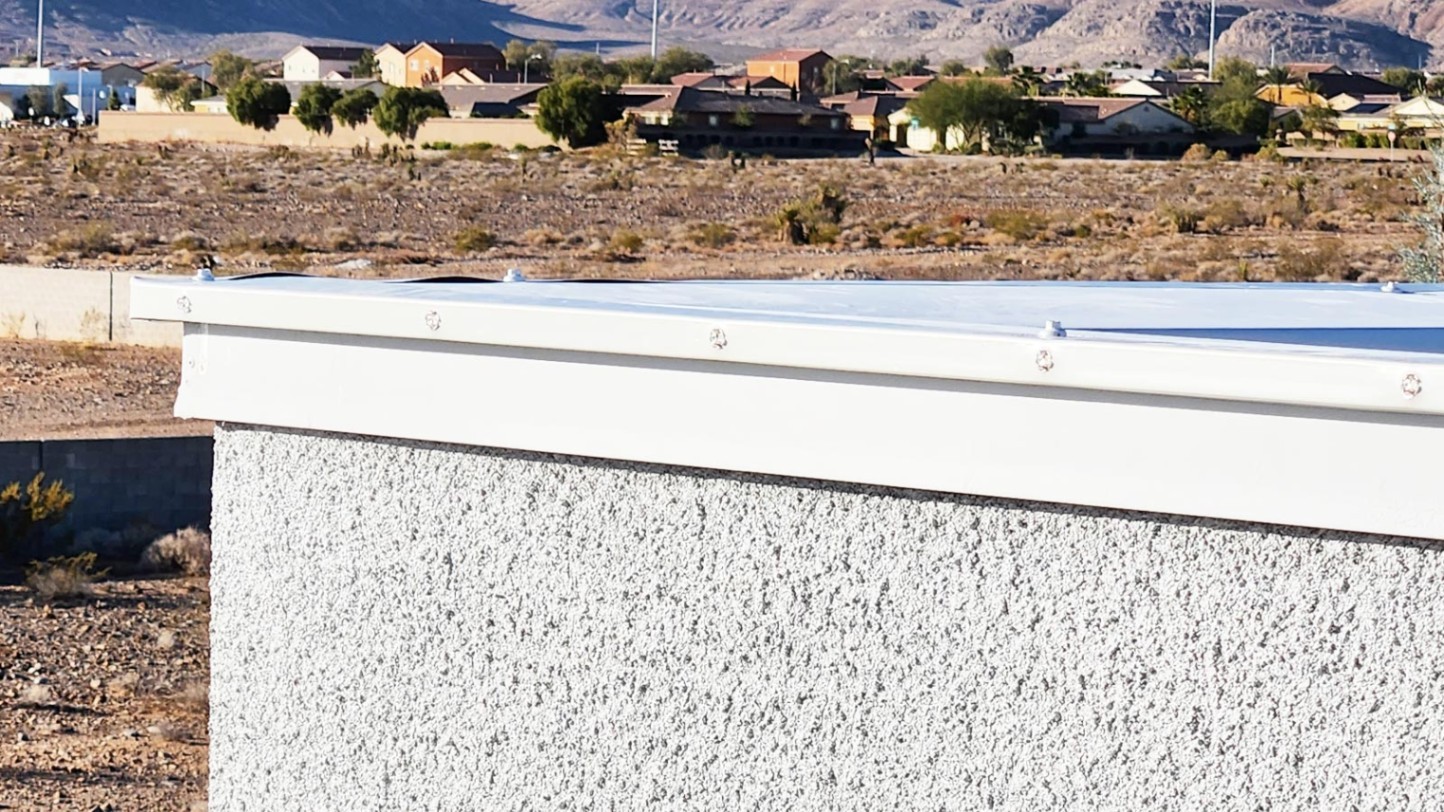
PixelLights 6' LED Light Cables + Channel
Our exclusive Starter Kits ship both 6-foot LED light cables and 6-foot pre-drilled aluminum channel sections ready to be assembled together. Simply snap the LED bulbs into the channel holes until they are filled. Once all channels are completed, you are ready for the next step.
+ Installs Quickly
Install on roofline sections:
Once all the 6-foot channel sections are assembled together. You are now ready to put the channel in place and secure it to the roofline where you want to put it. Continue as planned along the roofline.
If you need help schedule a time below or call us.
Phone: 435-691-5336
PixelLights Controller
Our PixelLights controller is where the magic happens! It’s the brain of the system, telling each pixel what it should be doing.
Check out this Video! The app allows users to design and create their own patterns, or select from a wide selection of preset ones. Brightness, color, and speed of the patterns are also controlled from the app and gives users full control over the look and feel of their lights.
The PixelLights Controller 24V includes (2 outputs, 200 ft each, max 400 ft). It's like having two zones without the extra cost or another power outlet to add power boosters like other systems.
A standard electrical outlet is all that's required to power the PixelLights Controller.
Depending on your layout the controller may be mounted outside as it is waterproof. We do our installs and try to install in garage.
IMPORTANT! DO NOT connect cables while the power is on. Doing so has the potential to surge power to the LEDs, which could cause harm to them.
Also needed a 2.4 network is needed to sync to your network.
Since the Controller uses an app on your phone or tablet, you will need to get the PixelLights app from Google Play or the App Store.
There are also many more options to control your Pixel Lights system on a computer.
All Explained in this manual here.
**Your warranty will not cover “Hot-plugged Lights.” This refers to lights that have been plugged into the controller while it is powered on. To ensure this does not happen, unplug the controller from the outlet and then plug in your strings.**
Download App for Your Device


COMMERCIAL GRADE
YOU KNOW IT WHEN YOU SEE IT!
Once you hold the LED cables in your hands, the quality of PixelLights becomes crystal clear.
Connecting Light Cables
SO EASY ANYONE CAN DO IT
PixelLights Cables Comes in 3 Lengths and each Pixel are spaced 9 inches.
TRUE Plug & Play
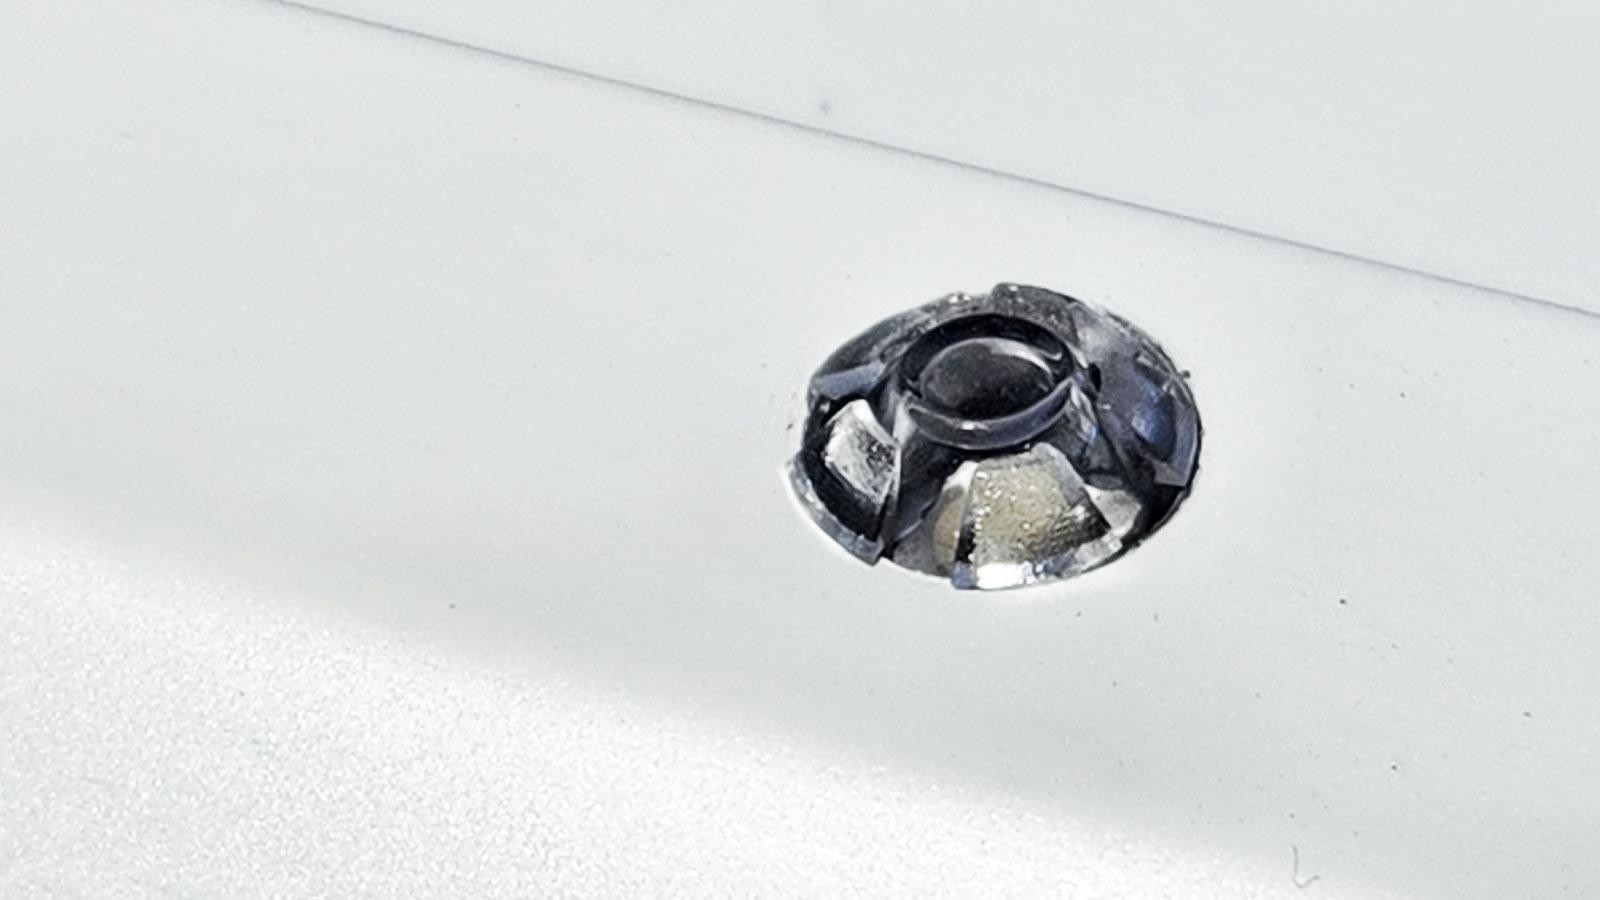
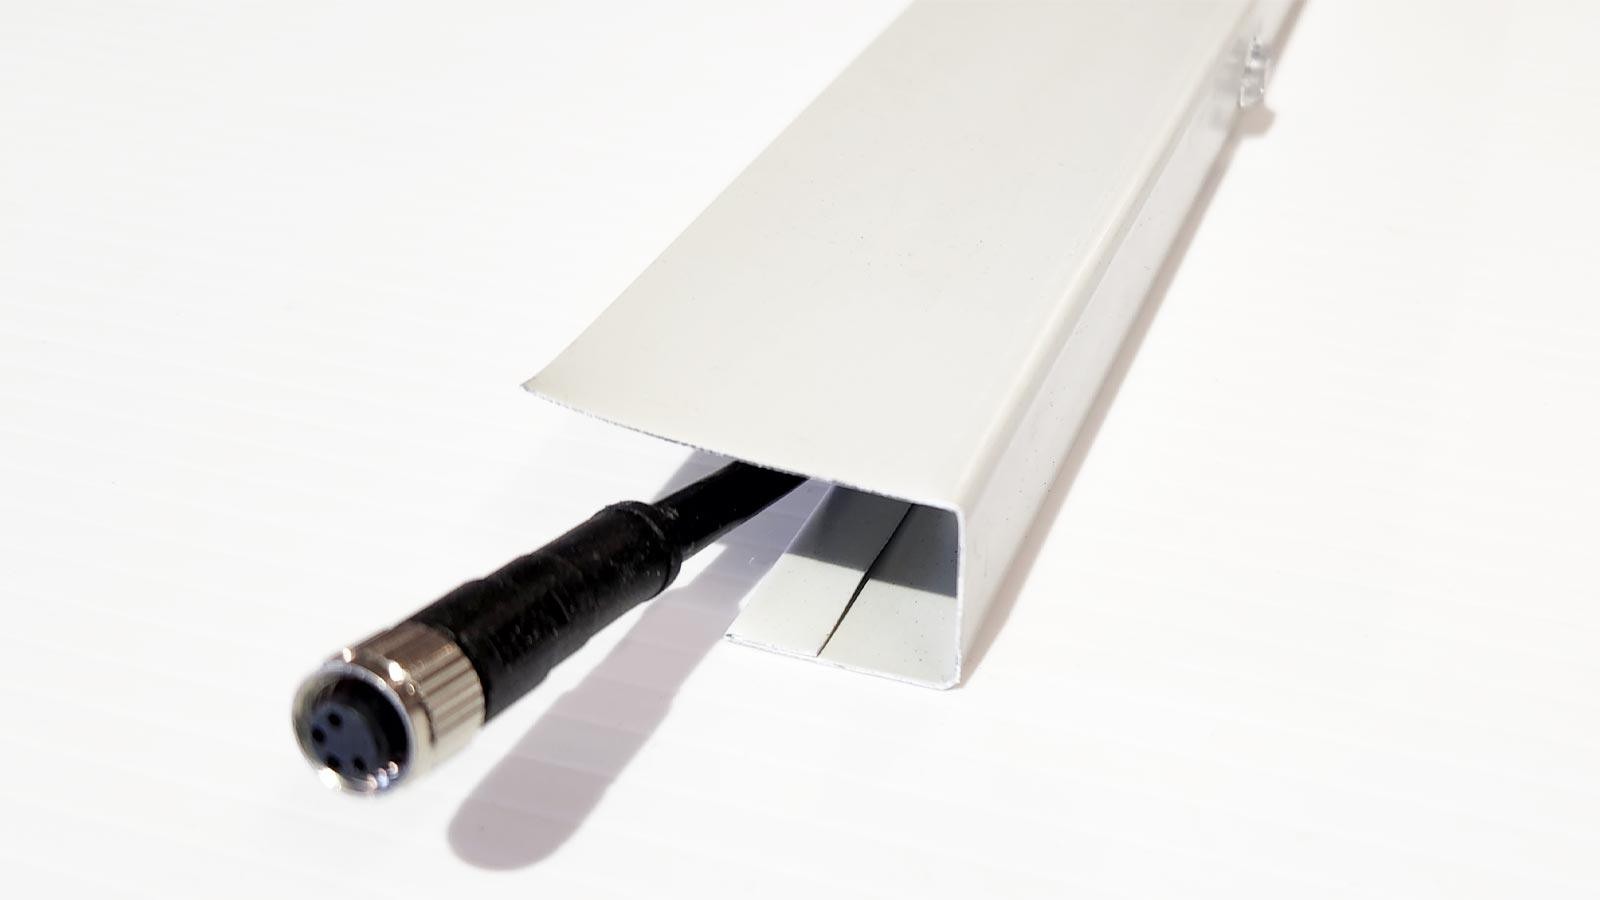
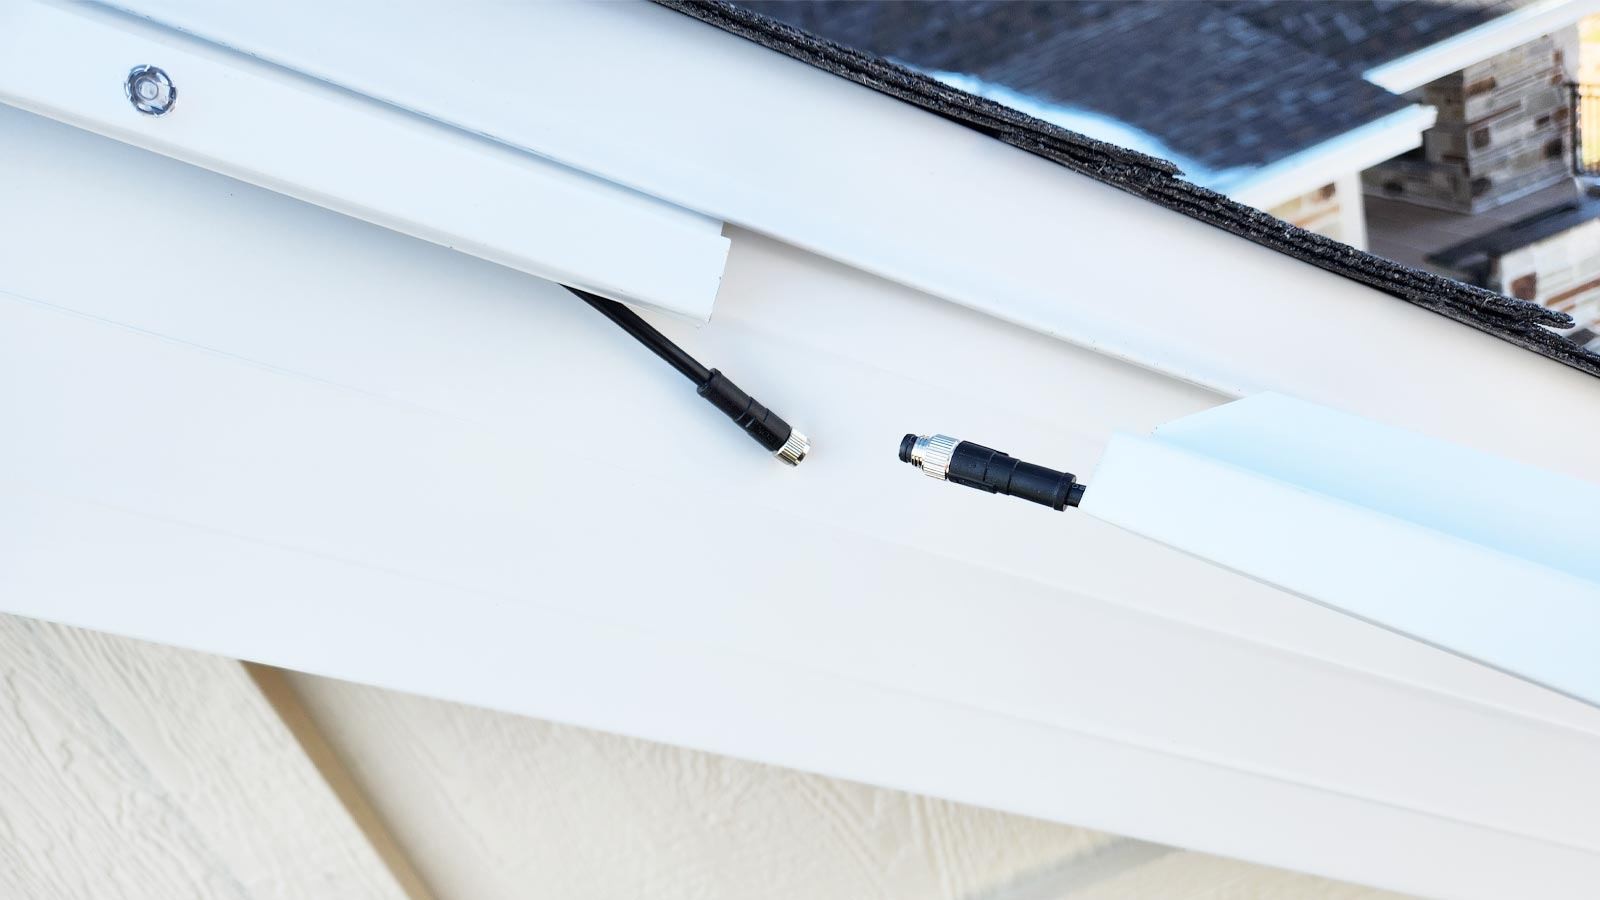
PixelLights UV-protected cables come with waterproof 4-pin aviation male-to-female connectors. They only connect in one direction with a simple insert and push, and they thread together in the same way that cable does. Note: Install Lights/channels first without controller plugged in.
ANY COMBINATIONS OF THESE 3 CABLES WILL EQUAL YOUR ROOF LINE DIMENSIONS
Example: How many Lit Cables are needed for 20 ft. Lit Run = 3-6ft =18ft 2-1ft=2ft 18+2=20 ft
Example: Lit Cables needed for 17 ft. Lit Run = 2-6ft =12ft. 2-2.5ft =5 12+5=17'
Any excess wire on end can be tucked under channel
DIY Channels/Track Allows Pixel Lights to be Installed Your Way.
Facing out like traditional Christmas lights or facing down to shine on the house (Wall Wash).
LED Channel Store has products with a budget in mind and also has good-looking channels to fit your style.
We can supply channels for DIYers, Contractors, and Installers large and small to keep up with your demand.


Check Out More Ways to Install by Seeing Videos on Each Channel
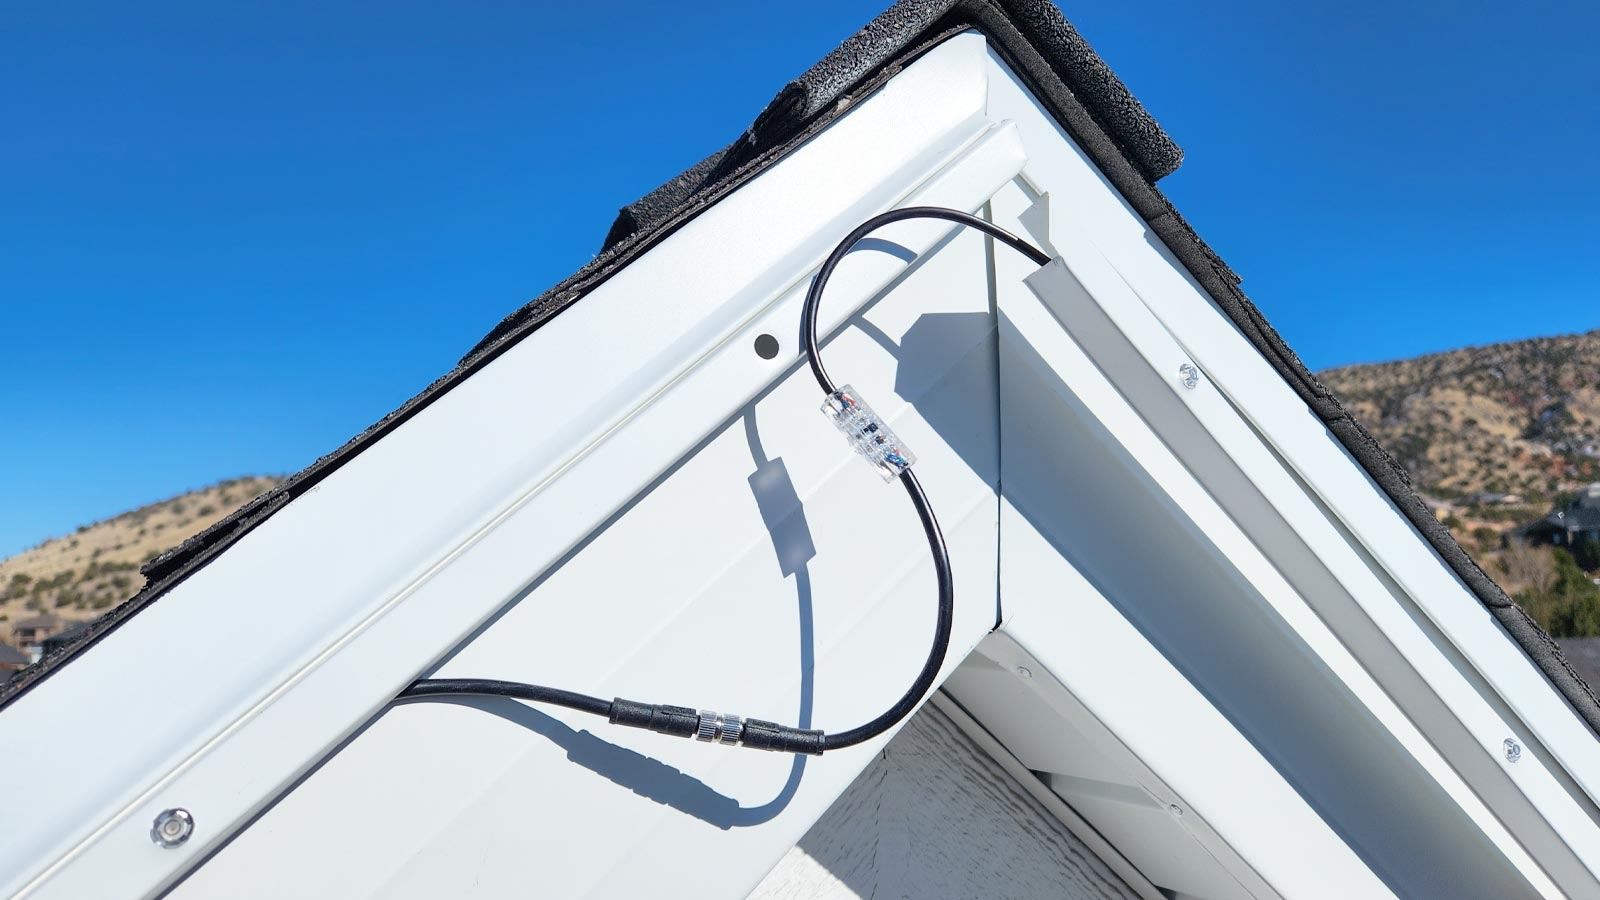
PixelLights Splitter
BUILT-IN DOUBLE SPLITS
A splitter is used to branch off and go to a dormer or high peak. The splitter allows the main light wires to continue in a straight line. With the two outlets on top of the box, to allow runs to go in two different directions.
Simply screw an unlit cable to one outlet and run wire to the desired area. Then connect Light/channels as normal.
IMPORTANT! When using a splitter, you must set the appropriate LED count for each output. This is accomplished by correctly positioning the small switches on the circuit board.
The Splitter Guide will assist you in determining the correct settings.
The termination of each string of LED lights for weatherproofing is crucial but simple; simply screw caps onto the ends of the LED light cables. One cap is included with each starter kit to complete a single run.
Quick links
Contact Us
We accept
